Pumpkin Swirl Cheesecake

Wow, I’m finally back from my blogging slump! Tonight I made a pumpkin swirl cheesecake. I love pumpkin everything, maybe just because it signifies fall. Or maybe I love fall because of pumpkins… Either way, you can feed me any kind of pumpkin something, and I’ll gobble it up! For this recipe, which I whipped up in about 15 minutes (besides cook time), I just used frozen pie crust (that may be a no-no, but it was super handy!), and I actually only used 8 ounces of cream cheese, because we didn’t have any more. But I’m pretty sure it would be even better with all the cream cheese! It was delicious!!!

Yum! On a side note, I can’t wait to show y’all my doily project!

Prep Time: 15 minutes

Cook Time: 50 minutes

Total Time: 1 hour, 5 minutes

Ingredients:

  • Pie crust
  • Filling:
  • 12 oz cream cheese, softened
  • 1 cup sugar, divided use
  • 1 teaspoon vanilla
  • 3 large eggs at room temperature
  • 3/4 cup canned pumpkin
  • 1 teaspoon ground cinnamon
  • 1/4 teaspoon ground ginger
  • 1/8 teaspoon ground nutmeg

Preparation:

Preheat oven to 350 degrees F. (300 degrees F. for a dark springform pan) and position the oven rack in the center of the oven.

For the Cheesecake Filling:
Using an electric mixer on medium speed, combine cream cheese, 1/2 cup of the sugar, and the vanilla until well blended. On low speed, 2 eggs one at a time, mixing each time just until blended. Remove two-thirds of the batter and set aside.

To the remaining batter, add remaining 1/2 cup sugar, 1 egg, pumpkin, cinnamon, nutmeg, and ginger. Using a large spoon, stir to combine.

Pour the pumpkin batter over crust in a pie pan. Spoon the set-aside batter over pumpkin layer. Using a long butter knife, gently swirl cheesecake batter without disturbing crust to achieve a marbled effect.

Bake for 50 minutes or until center is almost set. Do not overbake. Use a thin knife around the edge of the pan to loosen the crust. Cool completely on wire rack. Remove outer pan and refrigerate at least 4 hours, preferably overnight, before serving.

Yield: 12 servings

Raspberry Cupcakes

These cupcakes are a slight bit of a cheater’s version (cake mix out of a box!), but unfortunately they worked perfectly. I say unfortunately because I now may become a lazy baker and use a mix more often. I might say that a homemade mix would taste a little better. But if you’re in a time crunch, these are just the thing. The reason I made these is because I was craving a cupcake, but definitely not something that would sit heavy in my tummy. These meet both  criteria: #1- Cupcake and #2- Light. They are beautiful cupcakes except for the fact that they are blue. I wish I could made the raspberries stay a little more separated from the batter, but at least it didn’t mess up the taste! I’m sorry I can’t advertise how many fingerfuls of icing I had. Giada’s recipe that I used calls for almond extract which I did use, but I might recommend leaving that out. I adapted the recipe slightly by adding raspberries into the batter as well as the icing. So you can try hers (below), or use some of my pointers, or go all natural and make your own mix instead of using the boxed kind.

Here’s the batter before it turned blue!

Ingredients

  • 1 (18.25-ounce) box white cake mix (recommended: Duncan Hines Moist Deluxe)
  • 1 1/3 cups water
  • 3 large eggs whites
  • 2 tablespoons unsalted butter, melted
  • 2 teaspoons almond extract
  • 2 teaspoons vanilla extract
  • 2 (6-ounce) containers fresh raspberries, cut in half or 1 (16-ounce) container fresh strawberries, coarsely chopped
  • 1 cup heavy whipping cream
  • 1/3 cup powdered sugar, plus additional for dusting

Directions

Line 18 muffin cups with muffin papers. Preheat the oven to 350 degrees F.

Using an electric mixer, beat the cake mix, water, egg whites, melted butter, almond extract, and vanilla extract in a large bowl for 2 minutes, or until the batter is well blended. Using about 1/3 cup of batter for each cupcake, spoon the batter into the prepared muffin cups.

Bake the cupcakes until they are very pale golden on top, about 15 minutes. Cool the cupcakes completely on a cooling rack.

Using a fork, coarsely mash 1 1/2 containers of raspberries in a medium bowl. Beat the cream and 1/3 cup of powdered sugar in a large bowl until firm peaks form. Fold the mashed raspberries into the whipped cream.

Generously dollop a spoonful of icing onto each of the cupcakes and eat immediately.

Mint Chocolate Cupcakes

I generally cannot tolerate the mint/chocolate combination. But these cupcakes are sensational. I will admit they can’t be healthy. The icing is a mint  buttercream… emphasis on butter. The cake part of it is so easy to make, but the icing is the most complicated icing I’ve ever made. That’s not an exaggeration. You really can’t make these cupcakes and leave off the chocolate mint leaves. They just top it off (literally!). So if you have some time on your hands and some pounds to gain, these are the cupcakes for you. If you don’t, make ’em anyways! The recipe is here.

Here’s the chocolate mint leaves in the making:

The Orange Julius

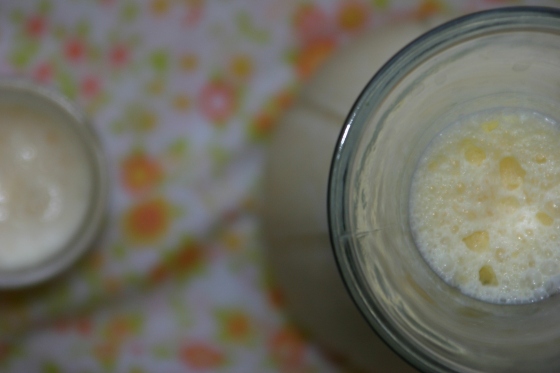
This is one of those words (I guess it’s actually two words) that I’ve wondered how to spell all my life: orange julius. Is it orangejoolius (which is probably my first instinct), oranchulias, or possibly orangejyoolious? The latter way is about how I spelled it when I endeavored to write a cookbook at age 6. I must have thought about it too much. I’m also curious why it’s called an orange julius. Did Julius Caesar come up with the recipe? Something tells me he wasn’t drinking orange ice cream out of a blender. Anyhow, it tastes good. It’s an utterly easy blender recipe to throw together. Scoop some vanilla ice cream into a blender, until it’s about halfway full. Then toss a couple handfuls of ice in and fill all the extra space with orange juice (hmmm… julius—-juice; strange similarity). Blend it up. The end-product is a light, frothy orange julius, perfect for a warm summer evening.

Apricot cup-cheese-cakes

I had an urge to bake cupcakes today. So I was flipping through my Martha Stewart cupcake book, trying to decide if I wanted something new, or one of the oldies. I came across this one which I have refused to make for years because its picture is similar to that of a raw egg. But today, it caught my eye, because my mom just canned a whole batch of apricot jam which I am always looking for an opportunity to eat. The chocolate, cheesecake, and apricot flavors seemed like odd amigos, but they complement eachother better than you would imagine. I love them! They were pretty quick and easy; and no icing is involved, an encouragement to me! If you don’t happen to be an apricot fan (you’re crazy if you’re not ; ), I think it would be good with raspberry or cherry jam, too.

Makes 18

Ingredients

  • 3/4 cup crumbled chocolate-wafer cookies (about 18 cookies)
  • 1/2 cup plus 1 tablespoon plus 1 teaspoon sugar
  • 1 1/2 ounces (3 tablespoons) unsalted butter, melted
  • 1 pound cream cheese, softened
  • 1/2 teaspoon pure vanilla extract
  • 2 large eggs, lightly beaten
  • 1/2 cup sour cream
  • Pinch of salt
  • 1/2 cup apricot jam

Directions

  1. Preheat oven to 350 degrees. Line standard muffin tins with paper liners. Mix cookies and 1 tablespoon plus 1 teaspoon sugar in a bowl. Stir in butter. Press 1 tablespoon of mixture in bottom of each cup. Bake until set, about 7 minutes. Let cool in tins on wire racks.
  2. Reduce oven temperature to 275 degrees. Beat cream cheese with a mixer on medium speed until smooth. Add remaining 1/2 cup sugar, then vanilla. With mixer running, add eggs slowly, scraping down side of bowl. Add sour cream and salt. Pour batter into muffin cups, filling almost to the tops.
  3. Bake until sides are set but centers are wobbly, about 20 minutes. Let cool in tins on wire racks. Wrap tins tightly with plastic, and refrigerate 4 hours or overnight.
  4. Warm jam in a small saucepan until liquidy. Strain through a sieve. Spoon 1 teaspoon jam on top of each cake.


Mexican chocolate cupcakes

I actually may have posted a very similar cupcake recipe before, but I’m pretty sure they couldn’t have been as good as these are. They are so delicious. They’re a moist, rich cake with a slightly spicy, cinnamon, essentially Mexican icing. In case y’all haven’t caught on yet, I’m in love with all things Mexican: Mexican hot chocolate, molcajetes (mortar and pestles), Mexican blankets, hot sauce,  Mexican doors, tacos, turquoise and brown; you get the idea. As a side note, the cayenne pepper does not really make it spicy; it just adds a nice Mexican flavor ;)

Mexican Chocolate Cupcakes: makes 24

Directions:

  1. Mix all ingredients together until moist and well blended.
  2. Put in cupcake cups and bake for 20-25 minutes at 350 degrees F.
Mexican frosting
  • 1/8 teaspoon cayenne pepper
  • 1/2 teaspoon ground cinnamon
  • 4 cups confectioners’ sugar, or more as needed
  • 1 (8 ounce) package cream cheese, softened
  • 1/2 cup butter, softened
  • 1/2 teaspoon clear vanilla extract, or to taste

Directions:

In a bowl, sift 1/8 teaspoon of cayenne pepper, and the cinnamon with the confectioners’ sugar. Beat in the cream cheese and butter with an electric mixer on medium speed until the frosting is smooth; mix in the vanilla extract.

Double Lemon Cupcakes

I refreshed myself with these silky delicacies after a day of weeding and raking in the hot outdoors. These were some of my favorites; they topped most others with their smooth cake and tart frosting. Yum!

Double Lemon Cupcakes

  • 3 cups self-rising flour
  • 1/2 teaspoon salt
  • 1 cup unsalted butter, at room temperature
  • 2 cups white sugar
  • 4 eggs, at room temperature
  • 1 teaspoon vanilla extract
  • 2 tablespoons lemon zest
  • 1 cup whole milk, divided
  • 2 1/2 tablespoons fresh lemon juice, divided
  1. Preheat oven to 375 degrees F (190 degrees C). Line 30 cupcake pan cups with paper liners.
  2. Sift the self-rising flour and salt together in a bowl. In another bowl, beat the unsalted butter and sugar with an electric mixer until light and fluffy. Beat in the eggs one at a time, beating each egg until incorporated before adding the next. Mix in the vanilla extract and lemon zest.
  3. Gently beat the flour mixture into the butter mixture, one third at a time, alternating with half the milk and half the lemon juice after each of the first 2 additions of flour. Beat until just combined; do not over mix.
  4. Fill the prepared cupcake liners with batter 3/4 full, and bake in the preheated oven until a toothpick inserted in the center comes out clean, about 17 minutes. Let the cupcakes cool in the pans for about 10 minutes before removing them to finish cooling on a rack.

Lemon Icing

  1. Add lemon rind to butter; cream well.
  2. Add part of sugar gradually, blending after each addition.
  3. Combine lemon juice and water; add to creamed mixture, alternately with remaining sugar, until of right consistency to spread.
  4. Beat after each addition until smooth.
  5. Add salt.

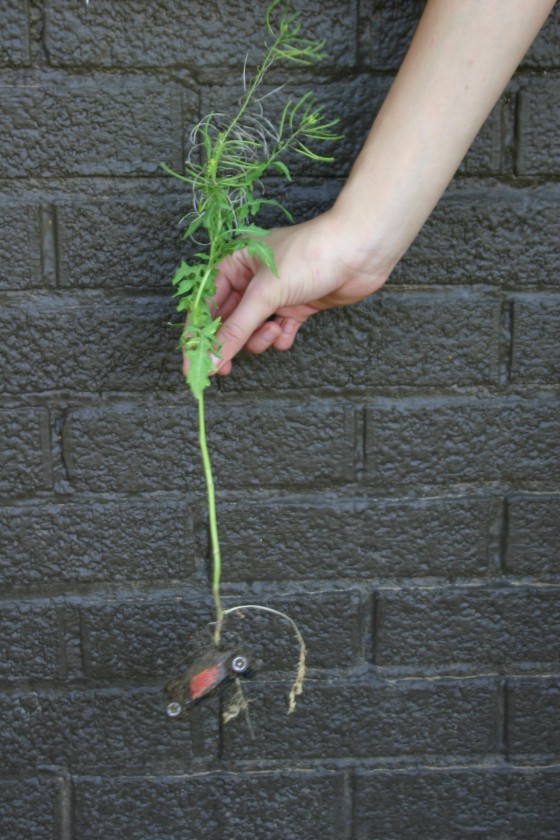
My curious weed: I uprooted it, and it was rooted in a hot wheels car! I couldn't keep this hilariousity to myself =D

Spinach Strawberry Salad

I just realized that my favorite and most frequent salad has never appeared on my blog. Sorry for depriving y’all of this. This goes great with chicken salad to make a heavenly and healthy spring picnic. Be sure to generously  pile on all the fixings. That way, by the time everyone’s done, you get the jackpot: the bottom. That’s where all the rejected extra strawberries and dressing and onions meet up. Guys, I literally grab a fork spoon and gorge all the leftovers down my throat. I’m tellin’ ya— it’s no good left over ;)

Spinach Strawberry Salad

Dressing:

1/4 c. distilled white vinegar

1/3 c. olive oil

1/4 c. white sugar

Pinch of paprika

1 tbs. minced onion

1 tbs. poppy seeds


Salad:

Spinach

Sliced strawberries

Chopped green onions

Parmesan

Sugared pecans


1. Shake all the dressing ingredients together.

2. Toss the dressing with all the salad ingredients.

WARNING: Beware all ye with braces, for fear of a green seedy metal mess.


I never let that stop me =D

Chocolate Cheesecake

I had a sudden urge to cook today. What could be a better recipe than chocolate cheesecake?!?! Though I’ve made mini cheesecakes, I’m not sure if I’ve ever made an actual single cheesecake, much less a chocolate one. I always feel guilty for getting Food Network magazines and oooh-ing and drooling over every picture, but never actually making the stuff in there. The March magazine was the ultimate chocolate issue, and, having already gotten the April issue, I almost missed cooking anything ultra-chocolate. That problem has been sitting in the back of my brain, so in my spare time today, my little brother and I flipped through the pages until we found Nigella’s chocolate cheesecake. We made it. It’s a keeper.

Chocolate Cheesecake

Prep Time:
35 min
Cook Time:
1 hr
Serves:
10 to 12 servings

Ingredients

For the base:

  • 1 1/3 cups graham cracker crumbs
  • 1/2 stick butter, melted
  • 1 tablespoon unsweetened cocoa powder

For the filling:

  • 6 ounces bittersweet or semisweet chocolate, chopped small
  • 2 1/2 cups cream cheese
  • 3/4 cup superfine sugar
  • 1 tablespoon Bird’s custard powder (available at baking supply stores)
  • 3 large eggs plus 3 egg yolks
  • 2/3 cup sour cream
  • 1/2 teaspoon unsweetened cocoa powder, dissolved in 1 tablespoon hot water

For the glaze:

  • 3 ounces semisweet chocolate, finely chopped
  • 1/2 cup heavy cream
  • 1 teaspoon dark corn syrup

Directions

To make the base, process the graham cracker crumbs, butter and cocoa powder in a food processor until it makes damp, clumping crumbs. Tip them into a 9-inch pie pan. Press the crumbs into the bottom of the pan to make an even base and put into the freezer while you make the filling.

Preheat the oven to 350 degrees F. Melt the chocolate either in a microwave or double boiler, and set aside to cool slightly.

To make the filling, beat the cream cheese to soften it, and then add the sugar and custard powder, beating again to combine. Beat in the whole eggs and then the yolks and the sour cream. Finally, add the cocoa dissolved in hot water and the melted chocolate and mix to make a smooth batter.

Take the pie pan out of the freezer and pour the cheesecake filling into the pan. Bake in the oven 50 minutes to 1 hour. The top of the cheesecake should be set, but the underneath should still have a wobble to it.

Let it slightly cool. Put in the fridge once it is no longer hot and leave to set, covered with plastic, overnight. Let it lose its chill before unspringing the cheesecake to serve.

To make the glaze, very gently melt the chopped chocolate, cream and corn syrup. When the chocolate has nearly melted, take it off the heat and whisk until smooth. Let it cool a little, then Jackson Pollock it over the cheesecake. Use the remaining glaze as an accompanying sauce.

Blackberry and Peach Cobbler

The background fabric is a sneek peek at my pleated sleeves dress!

Feeling a need for something fruity today, I made Pioneer Woman’s blackberry cobbler with a slight twist of my own— peaches. It turned out delicious and was easy as pie ;) Actually it was a lot easier than pie! It’s a very simple recipe, and I think it would be good with most any kind of fruit.

Ingredients

  • 1 stick Butter
  • 1-1/4 cup Sugar
  • 1 cup Self-Rising Flour
  • 1 cup Milk
  • 2 cups Blackberries (frozen Or Fresh)

Directions

Melt butter in a microwavable dish. Pour 1 cup of sugar and flour into a mixing bowl, whisking in milk. Mix well. Then, pour in melted butter and whisk it all well together. Butter a baking dish.

Now rinse and pat dry the blackberries. Pour the batter into the buttered baking dish. Sprinkle blackberries over the top of the batter; distributing evenly. Sprinkle ¼ cup sugar over the top.

Bake in the oven at 350 degrees for 1 hour, or until golden and bubbly. If you desire, sprinkle an additional teaspoon of sugar over the cobbler 10 minutes before it’s done.