Date and Walnut Blondie

Healthy Experiment #2

P1150051.JPG

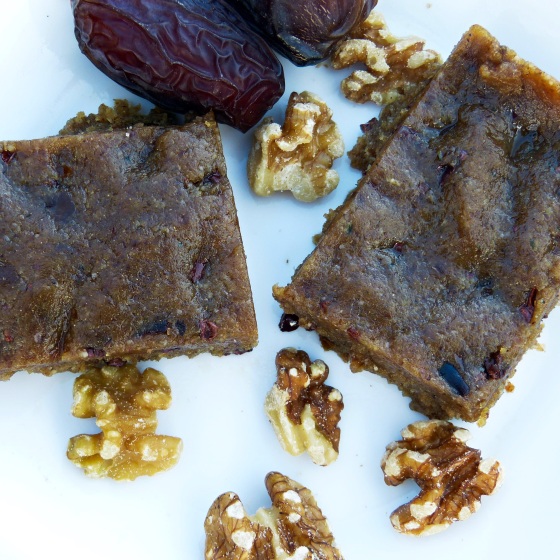
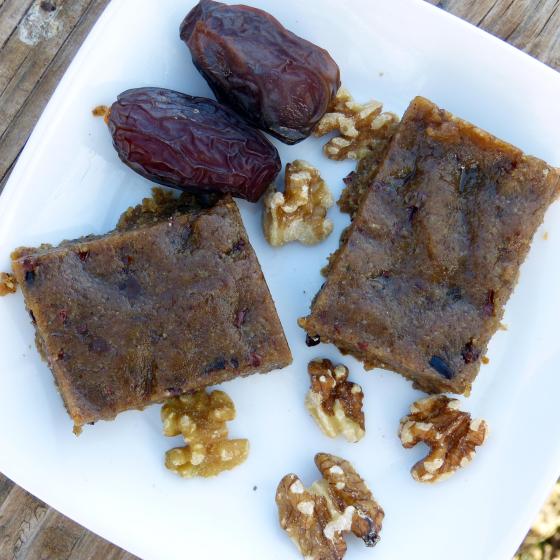
The first time I looked at this recipe, I was skeptical. And if I’m completely honest, I am still not 100% convinced that these little guys are worth the investment (Be warned– the maca powder cost me nearly 15 bucks). But, these date and walnut treats surprised me with their increasing appeal. The cacao nibs are the secret ingredient of the recipe, for me anyway. Not only do they provide a chocolately crunch, but they also are an excellent source of magnesium, iron, fiber, and all kinds of antioxidants! These raw blondies are piled up with superfoods, including walnuts, hemp seeds, maca powder, and cacao nibs. In other words, every single ingredient is worth having in your body, even if the price tag is a bit high.

This recipe is a slightly different version of “The Raw Blondie” found in the cookbook My New Roots.

Ingredients
– 2 cups whole raw walnuts
– ¼ cup maca powder
– ½ cup hemp seeds
– ½ teaspoon fine sea salt
– 2 ½ cups pitted Medjool dates
– ½ cup cacao nibs

Directions
1. Put the walnuts in a food processor and blend on high until the nuts are finely ground (but not too much).
2. Add the maca, hemp, and salt to the food processor. Pulse to combine.
3. With the food processor running, add the dates, one at a time, through the feed tube. The mixture should hold together, but should not form a paste. Sprinkle the cacao nibs in and pulse briefly to combine.
4. Line an 8-by-8 baking dish with plastic wrap. Press the mixture very firmly into the pan, so it holds together, especially around the edges. Chill in the freezer for at least 3 hours before eating.
5. Using a sharp knife, slice the blondie mixture into squares and serve. Store any extra blondies in an airtight container in the freezer for up to 3 months.

P1150053

I’ve been spending quite a bit of time looking up different superfoods and their benefits. This post would be a book long if I wrote everything I have read. So I recommend doing some research. It’s amazing some of yummy healthiness you might be missing out on!

Rich Chocolate Cake and Raspberry Whipped Cream

The title of this blog post pretty much describes my taste buds. Cream+ raspberries+chocolate (not the guilt-free, light and fluffy kind) = best dessert PERIOD. I was going to make it in the form of cupcakes, which make this girl happier than a monkey eating a banana. But seeing the shelves cupcake-liner-free and my hands being less than willing to scrub hole after hole of the muffin tin, I resorted to a cake. It proved itself; if it had been anything less than what I expected, I would now be signing a paper shunning the idea of ever making a cake again. Fortunately, the cake will be given more chances. Anyway, the cake recipe follows, and I just topped it with a homemade whipped cream which I mixed with a small bit of liquid raspberry jam (got the idea from my Food Network Magazine).

IMG_9215

INGREDIENTS

  • 1/2 cup Dutch-processed cocoa powder
  • 3/4 cup packed light brown sugar
  • 3/4 cup whole milk
  • 2 teaspoons vanilla extract
  • 8 tablespoons (1 stick) unsalted butter, at room temperature
  • 1 1/4 cups granulated sugar
  • 2 eggs
  • 1 1/4 cups all-purpose flour
  • 3/4 teaspoon baking soda
  • 1 teaspoon table salt

DIRECTIONS

1. Preheat the oven to 350°F. Prepare a 10-inch round cake pan by greasing it with cooking spray and then lining the bottom with parchment paper.

2. To make the cake, pour the cocoa powder, flour, baking soda, and salt into a bowl. Whisk thoroughly to ensure that all of the ingredients are incorporated.

3. In the bowl of an electric mixer fitted with the paddle attachment, beat the butter, brown sugar, vanilla, eggs and granulated sugar on medium speed until light-yellow and fluffy, about 3 minutes. Scrape down the sides of the bowl.

4. With the mixer running on low speed, mix in a third of the flour mixture and half of the milk. Scrape down the bowl. Add another third of the flour mixture and all the remaining milk. Remove the bowl from the mixer and, using a rubber spatula, fold in the remaining flour mixture until all of the ingredients are fully incorporated. Pour the batter into the prepared cake pan.

5. Bake for 25 minutes. Rotate the pan in the oven and bake for 20 more minutes, or until a cake tester inserted in the center of the cake comes out clean. Remove the pan from the oven and let the cake cool in the pan for 20 minutes. Then turn the cake out onto a clean plate, remove the parchment, and turn the cake back over onto a wire rack. Let the cake cool completely.